Fluffy Japanese Pancakes
Introduction
These Fluffy Japanese Pancakes are tall, soft, and incredibly light, with a delicate texture that makes them feel more like a soufflé than a traditional pancake. The secret is the whipped egg-white meringue, which is gently folded into the batter to create plenty of air.
They’re wonderful for a slow weekend breakfast or brunch and taste especially good with fresh berries, maple syrup, powdered sugar, or a little butter.
Quick Recipe Overview
- Prep Time: 15 minutes
- Cook Time: 15 minutes
- Total Time: 30 minutes
- Servings: 2
- Course: Breakfast, Brunch
- Cuisine: Japanese
- Calories: Approximately 250 per serving
Ingredients
Bowl 1 – Pancake Batter
- 1 egg yolk
- 2 tablespoons sugar
- 2 tablespoons milk
- ½ teaspoon pure vanilla extract
- 3 tablespoons cake flour
- ½ teaspoon baking powder
Bowl 2 – Meringue
- 2 large egg whites
- 1½ tablespoons sugar
Step-by-Step Instructions
1. Separate the eggs
Carefully separate the egg yolk from the egg whites. Place the yolk in one mixing bowl and the egg whites in a clean, dry bowl.
Make sure no egg yolk gets into the whites, as even a small amount of yolk can make whipping the meringue more difficult.
2. Make the pancake batter
Add the sugar to the egg yolk and whisk until smooth.
Add the milk and vanilla extract and whisk again until combined.
Sift in the cake flour and baking powder. Mix gently until you have a smooth, thick batter. Avoid overmixing.
3. Make the meringue
Using a clean electric mixer, beat the egg whites until they become foamy.
Gradually add the 1½ tablespoons of sugar while continuing to beat.
Whip until the egg whites form stiff, glossy peaks. When you lift the whisk, the peak should stand upright without collapsing.
4. Fold the meringue into the batter
Add about one-third of the meringue to the egg-yolk batter and gently fold it in to loosen the mixture.
Add the remaining meringue in two additions. Fold gently from the bottom of the bowl upward, taking care not to deflate the air in the egg whites.
The finished batter should look light and airy.
5. Heat the pan
Place a nonstick skillet over low heat. Lightly grease the pan if needed.
Low heat is important because these pancakes are tall and need enough time to cook through without becoming too dark on the outside.
6. Cook the pancakes
Spoon the batter into tall, rounded portions in the skillet. If you have enough batter, you can build the pancakes upward rather than spreading them out.
Cover the skillet with a lid and cook for about 4–5 minutes.
Carefully flip each pancake and cover again. Cook for another 4–5 minutes, or until the pancakes are cooked through.
7. Serve
Transfer the pancakes to serving plates and enjoy immediately.
Top with maple syrup, fresh berries, powdered sugar, butter, or your favorite toppings.
Recipe Tips for Success
- Use clean egg whites: Even a small amount of yolk can prevent the whites from whipping properly.
- Whip to stiff peaks: The meringue provides most of the pancakes’ signature height and airy texture.
- Fold gently: Overmixing can knock out the air and make the pancakes flat.
- Cook over low heat: High heat can brown the outside before the center is cooked.
- Keep the lid on: Covering the pan helps the tall pancakes cook more evenly.
- Serve immediately: Japanese soufflé-style pancakes are at their best while warm and freshly cooked.
- Don’t press them down: Avoid flattening the pancakes with your spatula while cooking.
Ingredient Substitutions
- Cake flour: If unavailable, all-purpose flour can be used, although the texture may be slightly less delicate.
- Milk: Whole milk works especially well, but other regular milk can also be used.
- Vanilla: Pure vanilla extract can be replaced with vanilla paste or omitted.
- Sugar: Regular granulated sugar is recommended for the best meringue texture.
Recipe Variations
Berry Japanese Pancakes
Serve the pancakes with fresh strawberries, blueberries, or raspberries and a light dusting of powdered sugar.
Chocolate Japanese Pancakes
Add a small amount of cocoa powder to the dry ingredients for a chocolate version. Keep the batter light and avoid adding too much extra dry ingredient.
Matcha Japanese Pancakes
Add a little matcha powder to the cake flour for a Japanese-inspired green tea variation.
Classic Pancake Style
Keep the pancakes simple and serve them with butter and warm maple syrup for a classic breakfast combination.
Storage and Reheating
These pancakes are best eaten immediately because their fluffy texture gradually becomes less airy after cooling.
If you have leftovers, store them in an airtight container in the refrigerator for up to 1 day.
Reheat gently in the microwave or in a covered skillet over low heat. Avoid overheating, as this can make the pancakes dry and cause them to lose their delicate texture.
Serving Suggestions
Serve these fluffy pancakes with:
- Maple syrup
- Fresh berries
- Powdered sugar
- Whipped cream
- Butter
- Sliced bananas
- Strawberry sauce
- Honey
For a brunch-style presentation, add fresh fruit and a light dusting of powdered sugar before serving.
Nutrition Information
Estimated per serving, before additional toppings:
- Calories: 250
- Protein: 9 g
- Carbohydrates: 35 g
- Fat: 7 g
- Saturated Fat: 3 g
- Fiber: 1 g
- Sugar: 18 g
- Sodium: 180 mg
Nutrition information is an estimate and may vary depending on the ingredients and brands used.
Frequently Asked Questions
Why are Japanese pancakes so fluffy?
The whipped egg-white meringue is the main reason. Folding the airy meringue into the batter creates a light structure that gives the pancakes their characteristic height.
Why did my Japanese pancakes collapse?
They may collapse if the meringue was under-whipped, overmixed into the batter, or if the pancakes were removed before the centers were fully cooked.
Can I use all-purpose flour instead of cake flour?
Yes. Cake flour produces a particularly soft texture, but all-purpose flour can be used if that’s what you have available.
Why do I need to cook them on low heat?
Because these pancakes are much thicker than regular pancakes. Low heat gives the center enough time to cook without burning the outside.
Can I make the batter ahead of time?
It’s best to cook the batter soon after preparing it. The whipped egg whites can lose air over time, which can reduce the pancakes’ height.
Can I make these pancakes without vanilla?
Yes. Vanilla adds flavor but isn’t essential to the structure of the pancakes.
What should I serve with Japanese pancakes?
Maple syrup, fresh berries, powdered sugar, whipped cream, and butter are all excellent choices.
Final Thoughts
These Fluffy Japanese Pancakes are a fun way to turn a few simple ingredients into an impressive breakfast. The whipped egg whites give them their signature cloud-like texture, while gentle cooking keeps the pancakes soft and tender.
For the best results, take your time with the meringue, fold it gently, and cook the pancakes slowly over low heat.
SEO Title
Fluffy Japanese Pancakes – Tall & Soft Soufflé-Style Recipe
Meta Description
Make fluffy Japanese pancakes at home with this easy recipe using whipped egg whites, cake flour, milk, and vanilla for a soft, airy breakfast.
URL Slug
fluffy-japanese-pancakes
Primary Keyword
Fluffy Japanese Pancakes
Secondary Keywords
- Japanese Pancakes
- Japanese Soufflé Pancakes
- Fluffy Pancakes
- Japanese Pancake Recipe
- Soufflé Pancakes Recipe
- Tall Fluffy Pancakes
- Easy Japanese Pancakes
- Soft Pancakes
- Fluffy Breakfast Recipe
- Japanese Breakfast
Related Search Terms
- How to make Japanese pancakes
- How to make fluffy Japanese pancakes
- Japanese soufflé pancakes recipe
- Tall fluffy pancakes
- Easy Japanese pancake recipe
- Soft and fluffy pancakes
- Japanese breakfast pancakes
- Soufflé style pancakes
5 Pinterest Titles
- Fluffy Japanese Pancakes – Tall, Soft & Airy
- Easy Japanese Soufflé Pancakes Recipe
- How to Make Fluffy Japanese Pancakes at Home
- Tall and Fluffy Japanese Pancakes for Breakfast
- Japanese Pancakes with a Light, Cloud-Like Texture
5 Pinterest Descriptions
- Make these Fluffy Japanese Pancakes at home! Light, tall, and airy, these soufflé-style pancakes are made with whipped egg whites and are perfect for a special breakfast or brunch.
- These Japanese Soufflé Pancakes are incredibly soft and fluffy. Learn the simple technique for making tall pancakes with a delicate, cloud-like texture.
- Looking for a special breakfast recipe? Try these Fluffy Japanese Pancakes made with cake flour, vanilla, milk, and a whipped egg-white meringue. Serve with berries and maple syrup.
- Tall, soft, and airy, these Fluffy Japanese Pancakes are a fun breakfast treat. Follow the simple steps for creating the perfect meringue and gently cooking the pancakes.
- Save this easy Japanese pancake recipe for your next weekend brunch! These fluffy soufflé-style pancakes are light, tender, and delicious with maple syrup, fresh fruit, or powdered sugar.
Easy Mini Cinnamon Rolls (Cinna-Minis) ½ cup milk I use whole milk, other % may be used ▢3 tablespoons butter room temperature, I used salted ▢¼ cup sugar I use all-natural cane sugar, white sugar may be used ▢¼ teaspoon kosher salt ▢1 large egg room temperature ▢2 ¼ cups bread flour add 2 Tablespoons for high altitude; may use unbleached all-purpose flour, but will be tougher ▢1 ⅛ teaspoons instant yeast I like Saf brand, if using Active Dry Yeast, follow pkg instructions to proof or allow more time for rising. Cinnamon Filling (make up 1 day ahead) ▢¼ cup butter room temperature, I used salted ▢1 ½ tablespoons ground cinnamon ▢½ cup brown sugar light or dark, packed Cream Cheese Frosting (make up to 2 days ahead) ▢2 Tablespoons butter room temperature ▢2 ounces cream cheese room temperature ▢1 cup powdered sugar also called confectioners sugar ▢½ teaspoon vanilla extract ▢1 Pinch salt ▢1-2 teaspoons cream or milk, just enough to get to spreading consistency
بالتأكيد. هذه نسخة كاملة وجاهزة للنشر على Ayoub Recipe، مع الحفاظ على المقادير التي أرسلتها.
Easy Mini Cinnamon Rolls (Cinna-Minis)
Introduction
These Easy Mini Cinnamon Rolls are soft, buttery, and packed with warm cinnamon and brown sugar. They’re smaller than traditional cinnamon rolls, making them perfect for breakfast, brunch, holidays, or a sweet afternoon treat.
The dough is made with simple ingredients and rolled around a rich cinnamon-brown sugar filling before being baked until lightly golden. A smooth cream cheese frosting finishes each little roll with just the right amount of sweetness.
You can even prepare the cinnamon filling and frosting ahead of time, making these Cinna-Minis easier to assemble when you’re ready to bake.
Quick Recipe Overview
- Prep Time: 25 minutes
- Rise Time: 1 hour
- Cook Time: 15–18 minutes
- Total Time: About 1 hour 40 minutes
- Servings: 20–24 mini rolls
- Course: Breakfast, Dessert
- Cuisine: American
- Calories: Approximately 170 per mini roll
Ingredients
Cinnamon Roll Dough
- ½ cup whole milk
- 3 tablespoons butter, room temperature
- ¼ cup sugar
- ¼ teaspoon kosher salt
- 1 large egg, room temperature
- 2¼ cups bread flour
- 1⅛ teaspoons instant yeast
Note: For high-altitude baking, add 2 tablespoons of flour. Unbleached all-purpose flour can also be used, although the rolls may be slightly less tender.
Cinnamon Filling
- ¼ cup butter, room temperature
- 1½ tablespoons ground cinnamon
- ½ cup brown sugar, packed
Cream Cheese Frosting
- 2 tablespoons butter, room temperature
- 2 ounces cream cheese, room temperature
- 1 cup powdered sugar
- ½ teaspoon vanilla extract
- 1 pinch salt
- 1–2 teaspoons cream or milk, as needed
Step-by-Step Instructions
1. Warm the milk
Warm the milk gently until it is lukewarm, not hot. You want it comfortable to the touch rather than steaming.
Add the milk, butter, sugar, salt, egg, bread flour, and instant yeast to a large mixing bowl.
2. Make the dough
Mix the ingredients until a soft dough forms. Knead the dough for about 5–7 minutes, either by hand or using a stand mixer with a dough hook.
The dough should become smooth and elastic and should feel soft without being excessively sticky.
3. Let the dough rise
Place the dough in a lightly greased bowl and cover it with a clean towel or plastic wrap.
Let it rise in a warm, draft-free place for about 45–60 minutes, or until noticeably puffy and close to doubled in size.
4. Prepare the cinnamon filling
While the dough rises, combine the room-temperature butter, brown sugar, and ground cinnamon.
Mix until you have a soft, spreadable cinnamon mixture.
If preparing ahead, the filling can be made up to 1 day in advance and refrigerated. Let it soften before spreading.
5. Roll out the dough
Transfer the risen dough to a lightly floured surface.
Roll it into a rectangle, approximately 12 × 18 inches. Try to keep the thickness fairly even so the mini rolls bake consistently.
6. Add the cinnamon filling
Spread the cinnamon-butter mixture evenly over the entire surface of the dough, leaving a small border around the edges.
7. Roll the dough
Starting from one long side, tightly roll the dough into a log.
Use gentle, even pressure as you roll so the filling stays inside without squeezing it out.
8. Cut the mini rolls
Using a sharp knife or unflavored dental floss, cut the log into approximately 20–24 small rolls.
Arrange them in a greased baking dish or pan, leaving a little space between each roll.
9. Let them rise again
Cover the rolls and let them rest for about 20–30 minutes, until they look puffy.
Meanwhile, preheat the oven to 350°F (175°C).
10. Bake
Bake the mini cinnamon rolls for approximately 15–18 minutes, or until they are lightly golden and cooked through.
Avoid overbaking them, as mini rolls can dry out more quickly than full-sized cinnamon rolls.
11. Make the frosting
While the rolls bake, beat the softened butter and cream cheese together until smooth.
Add the powdered sugar, vanilla extract, and a pinch of salt. Mix until combined.
Add 1 teaspoon of cream or milk and mix. Add another teaspoon only if needed until the frosting reaches a smooth, spreadable consistency.
12. Frost and serve
Allow the cinnamon rolls to cool for a few minutes, then spread the cream cheese frosting over the warm rolls.
Serve while they’re soft and fresh.
Recipe Tips for Success
- Use room-temperature ingredients: Soft butter, cream cheese, and a room-temperature egg incorporate more easily.
- Don’t overheat the milk: Very hot milk can interfere with yeast activity.
- Knead the dough properly: The dough should become smooth and elastic before its first rise.
- Don’t add too much flour: A slightly soft dough produces more tender cinnamon rolls.
- Roll tightly: A firm, even roll helps create attractive cinnamon swirls.
- Cut evenly: Similar-sized rolls will bake at the same rate.
- Don’t overbake: Mini cinnamon rolls need less time than full-sized rolls.
- Frost while warm: Let them cool slightly first, then spread the frosting while they’re still warm enough for it to soften over the tops.
Ingredient Substitutions
Milk
Whole milk gives the rolls a rich, tender texture, but other milk percentages can be used.
Flour
Bread flour is recommended for the recipe. Unbleached all-purpose flour can be substituted, although the rolls may have a slightly tougher texture.
Yeast
Instant yeast can be replaced with active dry yeast. Follow the package directions for proofing or allow additional rising time.
Butter
Unsalted butter can be used instead of salted butter. If using unsalted butter, you may want to add a small amount of additional salt.
Cream Cheese
For the frosting, full-fat cream cheese provides the richest texture, but reduced-fat cream cheese can also work.
Recipe Variations
Pecan Cinna-Minis
Sprinkle finely chopped pecans over the cinnamon filling before rolling the dough.
Apple Cinnamon Mini Rolls
Add a thin layer of finely diced apples over the cinnamon filling for an apple-cinnamon variation.
Chocolate Cinnamon Rolls
Add a light sprinkle of mini chocolate chips over the cinnamon filling before rolling.
Maple Cream Cheese Frosting
Replace part of the milk in the frosting with a small amount of maple syrup for a subtle maple flavor.
Storage and Reheating
Store leftover cinnamon rolls in an airtight container at room temperature for up to 2 days, or refrigerate them for up to 4–5 days because of the cream cheese frosting.
To reheat, warm an individual roll in the microwave for about 10–15 seconds.
You can also freeze the baked, unfrosted rolls. Wrap them well and freeze for up to 2–3 months. Thaw overnight in the refrigerator and warm gently before frosting.
Make-Ahead Tips
The cinnamon filling can be prepared up to 1 day ahead, while the cream cheese frosting can be prepared up to 2 days ahead.
Keep both refrigerated and bring them toward room temperature before using so they are easy to spread.
Serving Suggestions
These mini cinnamon rolls are delicious with:
- Fresh berries
- Sliced bananas
- Fresh fruit
- Coffee
- Tea
- Hot chocolate
- A glass of cold milk
They’re especially nice served warm for a weekend breakfast or brunch.
Nutrition Information
Estimated per mini roll with cream cheese frosting:
- Calories: 170
- Protein: 3 g
- Carbohydrates: 25 g
- Fat: 7 g
- Saturated Fat: 4 g
- Fiber: 1 g
- Sugar: 12 g
- Sodium: 130 mg
Nutrition information is an estimate and will vary depending on the final size of the rolls and the specific ingredients used.
Frequently Asked Questions
Can I make these mini cinnamon rolls ahead of time?
Yes. You can prepare the filling and frosting ahead of time. You can also assemble the rolls and refrigerate them before baking, then allow them to come closer to room temperature before baking.
Can I use all-purpose flour?
Yes, but bread flour is recommended for the best texture. All-purpose flour may produce slightly tougher rolls.
Can I use active dry yeast?
Yes. Follow the instructions on your yeast package to proof the yeast, or allow additional time for the dough to rise.
How do I know when the cinnamon rolls are done?
They should be lightly golden on top and cooked through in the center. Avoid baking them too long because mini rolls can become dry quickly.
Why are my cinnamon rolls tough?
Too much flour or overbaking are two common causes. Add flour gradually and stop once the dough becomes soft and workable.
Can I freeze Cinna-Minis?
Yes. For the best texture, freeze them unfrosted and add the cream cheese frosting after thawing and reheating.
How long does cream cheese frosting last?
The frosting can be prepared up to 2 days ahead and stored covered in the refrigerator.
Final Thoughts
These Easy Mini Cinnamon Rolls, or Cinna-Minis, are a fun smaller version of a classic favorite. The soft yeast dough, buttery cinnamon-brown sugar filling, and creamy cream cheese frosting make them ideal for breakfast, brunch, or whenever you want a homemade sweet treat.
Because the filling and frosting can be prepared ahead, they’re also a great recipe to keep in your weekend baking rotation.
SEO Title
Easy Mini Cinnamon Rolls (Cinna-Minis) with Cream Cheese Frosting
Meta Description
These Easy Mini Cinnamon Rolls are soft, buttery, and filled with cinnamon brown sugar, then topped with creamy cream cheese frosting. Perfect for breakfast!
URL Slug
easy-mini-cinnamon-rolls
Primary Keyword
Easy Mini Cinnamon Rolls
Secondary Keywords
- Mini Cinnamon Rolls
- Cinna-Minis
- Mini Cinnamon Roll Recipe
- Easy Cinnamon Rolls
- Cinnamon Rolls with Cream Cheese Frosting
- Homemade Mini Cinnamon Rolls
- Small Cinnamon Rolls
- Easy Breakfast Rolls
- Mini Sweet Rolls
- Cinnamon Roll Recipe
Related Search Terms
- How to make mini cinnamon rolls
- Easy mini cinnamon roll recipe
- Small cinnamon rolls with cream cheese frosting
- Homemade mini cinnamon rolls
- Mini cinnamon rolls from scratch
- Easy cinnamon rolls for breakfast
- Cinnamon rolls with brown sugar
- Mini cinnamon rolls recipe
5 Pinterest Titles
- Easy Mini Cinnamon Rolls with Cream Cheese Frosting
- Cinna-Minis – Soft & Easy Mini Cinnamon Rolls
- Homemade Mini Cinnamon Rolls for Breakfast
- Easy Mini Cinnamon Rolls with Cinnamon Sugar Filling
- Soft Mini Cinnamon Rolls with Cream Cheese Icing
5 Pinterest Descriptions
- These Easy Mini Cinnamon Rolls are soft, buttery, and filled with cinnamon and brown sugar. Finish them with creamy cream cheese frosting for the perfect breakfast treat!
- Make these adorable Cinna-Minis for breakfast or brunch! Soft homemade dough, a buttery cinnamon-brown sugar filling, and smooth cream cheese frosting make these mini rolls irresistible.
- Looking for an easy homemade cinnamon roll recipe? These mini cinnamon rolls are soft, tender, and topped with a simple cream cheese frosting. Perfect for weekend baking.
- These Mini Cinnamon Rolls are made with a soft yeast dough, warm cinnamon filling, and creamy frosting. Prepare the filling and frosting ahead to make baking even easier!
- Save this easy Cinna-Minis recipe for your next brunch! These small cinnamon rolls are packed with cinnamon-brown sugar flavor and finished with sweet cream cheese frosting.
Today 12:01 PM
Chicken Chow Mein 6 oz boneless chicken breast or thighs , thinly sliced 1 tablespoon Shaoxing wine (or dry sherry) 2 teaspoons cornstarch 1/4 teaspoon salt Sauce 1/4 cup chicken broth 2 tablespoons Shaoxing wine (or dry sherry) 2 tablespoons oyster sauce 1 tablespoon soy sauce (*Footnote 1) 2 teaspoons sugar 1/4 teaspoon white pepper (or ground black pepper) 1 teaspoon sesame oil Stir fry 2 tablespoons peanut oil (or vegetable oil) 4 cups shredded cabbage (*Footnote 2) 2 cloves garlic , finely chopped 1 tablespoon ginger , minced 10 oz fresh chow mein noodles , or 6 oz (170 g) dried chow mein noodles 2 small carrots , julienned (yields 1 cup) (*Footnote 2) 1 anaheim pepper or other hot pepper of your choice , sliced (Optional) 4 green onions , cut into 2” (5 cm) pieces, white part halved lengthwise
بالتأكيد. إليك نسخة كاملة وجاهزة للنشر على Ayoub Recipe، مع الحفاظ على المقادير التي أرسلتها وعدم إضافة مكونات أساسية غير موجودة في قائمتك.
Chicken Chow Mein
Introduction
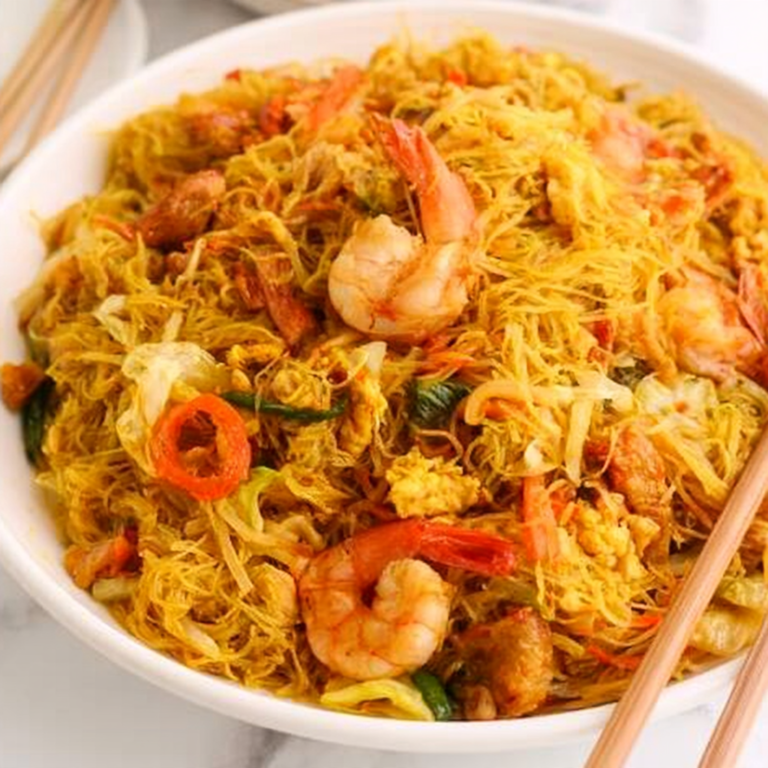
This easy Chicken Chow Mein brings together tender slices of chicken, chewy chow mein noodles, crisp cabbage, carrots, green onions, and aromatic garlic and ginger in a savory homemade sauce.
The sauce combines chicken broth, Shaoxing wine, oyster sauce, soy sauce, sesame oil, and a touch of sugar for a balanced flavor. Everything comes together quickly in a hot wok or large skillet, making this a great choice when you’re craving homemade takeout-style noodles.
Quick Recipe Overview
- Prep Time: 20 minutes
- Cook Time: 15 minutes
- Total Time: 35 minutes
- Servings: 4
- Course: Main Course
- Cuisine: Chinese
- Calories: Approximately 520 per serving
Ingredients
Chicken Marinade
- 6 oz boneless chicken breast or thighs, thinly sliced
- 1 tablespoon Shaoxing wine, or dry sherry
- 2 teaspoons cornstarch
- ¼ teaspoon salt
Chow Mein Sauce
- ¼ cup chicken broth
- 2 tablespoons Shaoxing wine, or dry sherry
- 2 tablespoons oyster sauce
- 1 tablespoon soy sauce
- 2 teaspoons sugar
- ¼ teaspoon white pepper, or ground black pepper
- 1 teaspoon sesame oil
Stir-Fry
- 2 tablespoons peanut oil, or vegetable oil
- 4 cups shredded cabbage
- 2 cloves garlic, finely chopped
- 1 tablespoon ginger, minced
- 10 oz fresh chow mein noodles, or 6 oz (170 g) dried chow mein noodles
- 2 small carrots, julienned, about 1 cup
- 1 Anaheim pepper or another hot pepper, sliced (optional)
- 4 green onions, cut into 2-inch (5 cm) pieces, with the white part halved lengthwise
Step-by-Step Instructions
1. Marinate the chicken
Place the thinly sliced chicken in a bowl. Add the Shaoxing wine, cornstarch, and salt.
Mix well until the chicken is evenly coated. Set aside while you prepare the remaining ingredients.
2. Make the sauce
In a small bowl, combine the chicken broth, Shaoxing wine, oyster sauce, soy sauce, sugar, white pepper, and sesame oil.
Stir until the sugar is mostly dissolved, then set the sauce aside.
3. Prepare the noodles
If using dried chow mein noodles, cook them according to the package directions until just tender. Drain well.
If using fresh chow mein noodles, prepare them according to the package instructions. Make sure the noodles are well drained before stir-frying.
Avoid overcooking the noodles because they will cook again in the wok.
4. Heat the wok
Heat a large wok or skillet over high heat until hot.
Add the peanut oil and swirl it around the pan.
5. Cook the chicken
Add the marinated chicken in a single layer.
Stir-fry for about 2–3 minutes, turning the pieces occasionally, until the chicken is nearly cooked through and lightly browned.
Transfer the chicken to a plate and set aside.
6. Stir-fry the vegetables
Add the cabbage and carrots to the hot wok.
Stir-fry for about 2 minutes, keeping the vegetables moving so they cook quickly while retaining some crispness.
Add the garlic, ginger, and optional Anaheim pepper. Stir-fry for another 30–60 seconds, until fragrant.
7. Add the noodles
Add the prepared chow mein noodles to the wok.
Toss everything together using tongs or two spatulas, separating the noodles as needed.
8. Add the sauce
Pour the prepared sauce around the sides of the wok so it heats quickly, then toss the noodles and vegetables together.
Continue stir-frying for about 2–3 minutes, until the noodles are evenly coated and the sauce has been absorbed.
9. Return the chicken
Add the cooked chicken back to the wok along with the green onions.
Toss everything together for another 1–2 minutes, until the chicken is fully cooked and everything is hot.
10. Serve
Remove from the heat and serve the Chicken Chow Mein immediately while the noodles are hot.
Recipe Tips for Success
- Slice the chicken thinly: Thin pieces cook quickly and stay tender.
- Prepare everything first: Stir-frying moves quickly, so have the sauce, vegetables, chicken, and noodles ready before heating the wok.
- Use high heat: A hot wok gives the noodles and vegetables a better stir-fried texture.
- Don’t overcrowd the wok: If your wok or skillet is small, cook in batches.
- Don’t overcook the noodles: Slightly undercooked noodles hold up better during the final stir-fry.
- Keep the vegetables slightly crisp: Cabbage and carrots should have some texture rather than becoming completely soft.
- Use fresh ginger and garlic: They add much more aroma to the finished dish.
- Add the sauce gradually if needed: Depending on your noodles, you may not need every drop at once.
Ingredient Substitutions
Chicken
Use boneless chicken breast or thighs. Thigh meat tends to stay especially juicy, while breast meat provides a leaner option.
Shaoxing Wine
Dry sherry is a convenient substitute if you don’t have Shaoxing wine.
Peanut Oil
Vegetable oil can be used instead.
Chow Mein Noodles
Fresh chow mein noodles can be replaced with dried chow mein noodles. Follow the package instructions for cooking.
Soy Sauce
Low-sodium soy sauce can be used if you prefer to reduce the saltiness.
White Pepper
Ground black pepper works well as a substitute.
Anaheim Pepper
You can leave the pepper out completely or use another hot pepper according to your preferred level of heat.
Recipe Variations
Spicy Chicken Chow Mein
Keep the Anaheim pepper or replace it with a hotter chili pepper for a spicier version.
Chicken Vegetable Chow Mein
Increase the cabbage and carrots, or add other quick-cooking vegetables you enjoy.
Chicken Chow Mein with Thighs
Use boneless chicken thighs for a richer flavor and especially tender pieces of chicken.
Extra-Garlic Chow Mein
Add additional fresh garlic if you enjoy a stronger garlic flavor.
Storage and Reheating
Store leftover Chicken Chow Mein in an airtight container in the refrigerator for up to 3–4 days.
To reheat, place the noodles in a skillet over medium heat with a small splash of water. Toss occasionally until heated through.
You can also reheat individual portions in the microwave, stirring halfway through.
For the best texture, avoid repeatedly reheating the entire batch.
Serving Suggestions
Chicken Chow Mein works well as a complete meal on its own. You can also serve it with:
- Steamed vegetables
- Asian cucumber salad
- Spring rolls
- Dumplings
- Stir-fried vegetables
- A light soup
Nutrition Information
Estimated per serving:
- Calories: 520
- Protein: 27 g
- Carbohydrates: 59 g
- Fat: 19 g
- Saturated Fat: 4 g
- Fiber: 6 g
- Sugar: 10 g
- Sodium: 1,350 mg
Nutrition information is an estimate and will vary depending on the noodles, chicken cut, sauces, and brands used.
Frequently Asked Questions
What is the best chicken for Chicken Chow Mein?
Both chicken breast and boneless chicken thighs work well. Thinly sliced thighs tend to be more tender, while chicken breast is a leaner option.
Can I use spaghetti instead of chow mein noodles?
Yes, in a pinch. The texture won’t be exactly the same, but cooked spaghetti can work as a substitute for chow mein noodles.
Why does my chow mein become soggy?
Too much moisture, overcooked noodles, or overcrowding the wok can make chow mein soggy. Drain the noodles thoroughly and cook everything over high heat.
Can I make Chicken Chow Mein ahead of time?
Yes. You can prepare the chicken, vegetables, sauce, and noodles ahead of time. For the best texture, stir-fry everything together shortly before serving.
Can I use leftover cooked chicken?
Yes, although this recipe is designed for thinly sliced raw chicken. If using cooked chicken, add it toward the end of the stir-fry so it doesn’t become dry.
Is Shaoxing wine necessary?
It contributes a characteristic savory depth, but dry sherry is a suitable substitute.
Can I make this recipe vegetarian?
Yes. Replace the chicken with additional vegetables and use a vegetarian oyster sauce if needed. You’ll also want to use a suitable vegetable broth.
Final Thoughts
This Chicken Chow Mein is a great homemade alternative to takeout, combining chewy noodles, tender chicken, crunchy vegetables, and a savory sauce in one quick stir-fry.
The key to getting the best texture is preparing everything before you start cooking and using a very hot wok or skillet. Once the ingredients are ready, the dish comes together in minutes
PrintFluffy Japanese Pancakes
This easy Chicken Chow Mein is a flavorful homemade takeout-style meal made with tender chicken, chewy chow mein noodles, crisp cabbage, carrots, garlic, ginger, and green onions tossed in a savory stir-fry sauce. It’s quick, satisfying, and perfect for an easy weeknight dinner.
- Prep Time: 15 min
- Cook Time: 15 min
- Total Time: 30 min
- Yield: 4 servings
- Category: Dinner
- Method: Stovetop
- Cuisine: Chinese
Ingredients
- 6 oz boneless chicken breast or thighs, thinly sliced
- 1 tablespoon Shaoxing wine or dry sherry
- 2 teaspoons cornstarch
- 1/4 teaspoon salt
- 1/4 cup chicken broth
- 2 tablespoons Shaoxing wine or dry sherry
- 2 tablespoons oyster sauce
- 1 tablespoon soy sauce
- 2 teaspoons sugar
- 1/4 teaspoon white pepper or ground black pepper
- 1 teaspoon sesame oil
- 2 tablespoons peanut oil or vegetable oil
- 4 cups shredded cabbage
- 2 cloves garlic, finely chopped
- 1 tablespoon fresh ginger, minced
- 10 oz fresh chow mein noodles or 6 oz (170 g) dried chow mein noodles
- 2 small carrots, julienned
- 1 Anaheim pepper or other hot pepper, sliced, optional
- 4 green onions, cut into 2-inch pieces, white part halved lengthwise
Instructions
- Combine the sliced chicken with Shaoxing wine, cornstarch, and salt. Mix well and let it marinate for about 10 minutes.
- In a small bowl, combine the chicken broth, Shaoxing wine, oyster sauce, soy sauce, sugar, white pepper, and sesame oil. Stir until the sugar dissolves.
- Prepare the chow mein noodles according to the package directions. Drain well and set aside.
- Heat a large wok or skillet over high heat. Add 1 tablespoon of peanut oil and swirl to coat.
- Add the marinated chicken and stir-fry for 2–3 minutes, until lightly browned and cooked through. Remove the chicken and set aside.
- Add the remaining tablespoon of oil to the wok. Add the cabbage, carrots, and optional Anaheim pepper. Stir-fry for 2–3 minutes until the vegetables begin to soften but remain crisp.
- Add the garlic and ginger and stir-fry for about 30 seconds until fragrant.
- Add the cooked chow mein noodles and return the chicken to the wok. Toss everything together.
- Pour the prepared sauce around the sides of the wok. Stir-fry for 2–3 minutes until the noodles are evenly coated and the sauce is absorbed.
- Add the green onions and toss for another 30–60 seconds.
- Serve immediately while hot.
Notes
- Fresh chow mein noodles provide the best chewy texture, but dried noodles can also be used.
- Cook the noodles according to the package directions and drain them thoroughly before stir-frying.
- For the best stir-fry texture, use high heat and avoid overcrowding the wok.
- You can substitute vegetable oil for peanut oil if needed.
- Add more sliced hot pepper or chili sauce if you prefer a spicier Chicken Chow Mein.
- Slice the chicken thinly and evenly so it cooks quickly and stays tender.